Night photography opens a visual world completely different from daylight. Illuminated streets, starry skies and urban landscapes gain a unique atmosphere once night falls. It may seem challenging at first, but with a few simple adjustments it is possible to capture sharp images full of character. Understanding how to use the available light and manage key camera settings makes a significant difference. These 10 tips will help you take better night photography shots.
1. Tripod: The Key to Sharp Night Photos
Night photography often requires slower shutter speeds. This means the camera needs more time to capture light. In these conditions, even the smallest movement can make the image appear blurry.
A tripod keeps the camera completely stable and helps produce sharper, more defined photos. If you cannot bring a tripod on your trip, place the camera on a stable surface. Rocks or benches can work well to avoid any movement.
2. Manual Mode: Full Control of the Camera
Manual mode allows you to fully control the camera settings, such as aperture, shutter speed and ISO. In night photography, these parameters are essential to capture light correctly and avoid dark or blurry images.
Adjusting them intentionally will help you experiment and find the right balance for each scene. Looking at examples of night photography and reviewing the camera settings used in each shot can also serve as a helpful starting guide.
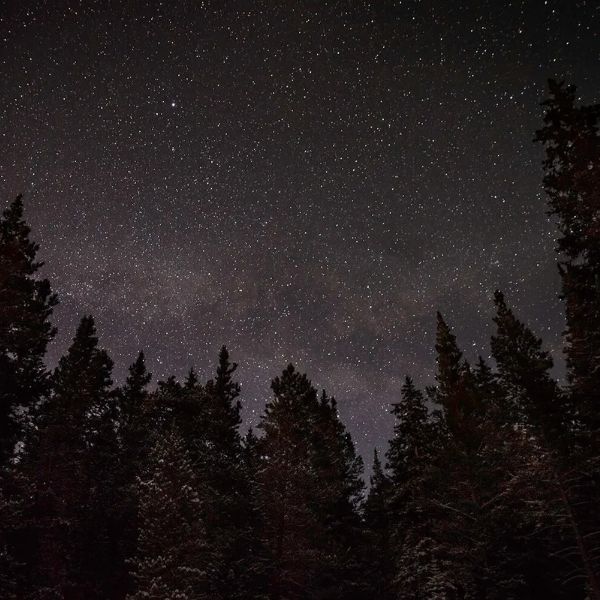
Shutter speed: 15 seconds, aperture f/2.8, ISO 3200
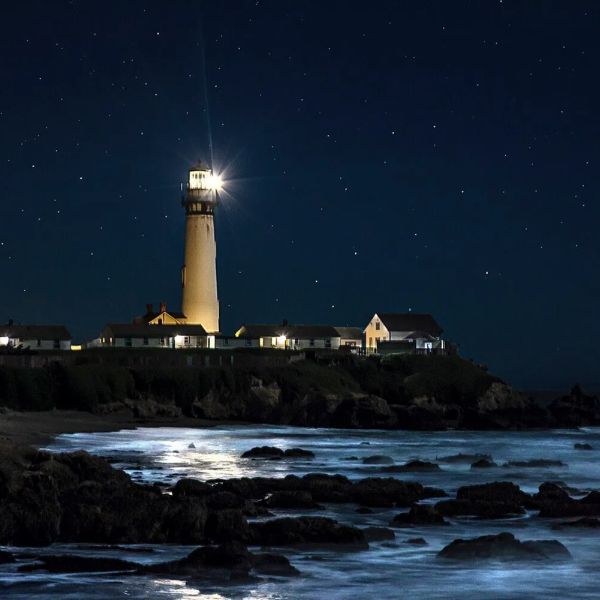
Exposure: shutter speed 6 seconds, aperture f/5.6, ISO 1600
3. Perfect Lens: Wide-Angle or Short Telephoto
Choosing the right lens can make a big difference in night photography. Wide-angle lenses capture more of the scene, making them ideal for landscapes, starry skies or urban photography.
Short telephoto lenses, on the other hand, work very well for isolating illuminated subjects such as buildings, monuments or architectural details. Some well-known and versatile lenses for this type of photography include the Canon EF 16–35mm f/2.8, very popular for night landscapes, the Nikon 24–70mm f/2.8, a well-balanced standard zoom, and the Sony FE 35mm f/1.8, a bright and compact lens that performs very well in low-light conditions.
4. The Ideal Moment: Blue Hour
The moment when you take the photo greatly influences the final result. One of the best times for night photography is the so-called blue hour, just after sunset or before sunrise. At that time, the sky still retains a deep tone while city lights begin to turn on.
During this brief period, the contrast between the sky and artificial lighting creates very attractive scenes. It is also a good moment to achieve balanced exposures without raising the ISO too much. Planning your shot based on the available light can make a big difference in the final image.
5. Useful Apps: A Light Meter on Your Phone
There are mobile apps such as Light Meter – Lite and Lightme – Lightmeter that can help improve your night photos. Some of them work as a light meter, a device that measures the intensity or brightness of light in a scene. This information helps you better adjust parameters such as ISO, aperture or shutter speed.
Having a clear reference of the available light makes it easier to find the correct exposure. Using these tools can help you make more precise decisions and achieve better-balanced night photography.
6. Extra Light: A Creative Tool
Additional light can help highlight an object or add a creative touch to the scene. In night photography, a flashlight, LED light or even your phone’s light can illuminate specific elements within the frame.
It is also a technique commonly used for light painting, creating light trails or illuminating parts of the landscape during the exposure. This approach works especially well to highlight a foreground element while the background remains dark. The key is to allow yourself to fully unleash your creativity so you can
7. High ISO: Greater Light Sensitivity
ISO can be very helpful in night photography because it allows the camera sensor to capture more light. Using a higher ISO makes it easier to photograph in dark environments without extremely long exposures.
However, it is important to find a balance, because very high values may introduce noise in the image. The goal is to raise the ISO just enough to illuminate the scene without losing too much quality.
8. RAW Format: More Information in the Image
Using RAW format is a major advantage in night photography. This format stores much more image information than a JPEG file, which allows you to recover details in shadows and highlights during editing.
It also provides greater flexibility to adjust exposure, white balance and color without losing quality. In night scenes, where light is limited and contrast is high, working in RAW helps achieve more accurate and professional results.
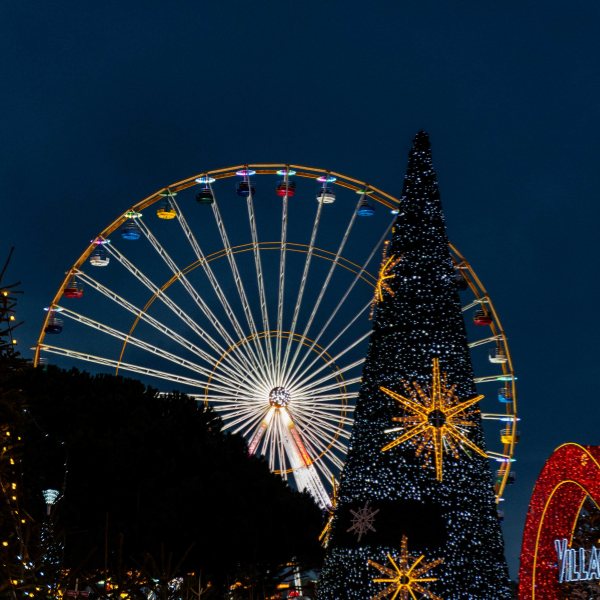
Source: Sofia Falke
9. The Right Scene: The Environment Matters
The location you choose is just as important as the subject you are photographing. A good landscape, a street with interesting lighting or a well-lit building can completely transform an image.
In night photography, city lights, reflections and the sky also become part of the composition. Spending a few minutes observing your surroundings and selecting a good frame can make a big difference in the final result.
10. Preparation: Know the Location
Learning about the place before you arrive can help you achieve better results. Searching for pictures of the location, analyzing compositions or seeing how other photographers captured the scene can provide useful ideas.
It can also help identify interesting viewpoints, night lighting or the best moments to take photos. Spending a few minutes researching the location will help you arrive with clear ideas and make better use of your time.
When Night Falls, the Magic Begins
Night photography invites you to see places from a completely different perspective. Artificial light, reflections and contrast with darkness create scenes that simply do not exist during the day. With a few technical adjustments and some planning, it is possible to transform an ordinary scene into an image full of atmosphere. Practice, experimentation and careful observation of light are the keys to improving in night photography.